Cinnamon Buns | Recipe

Posted on

I have tested many variations of Cinnamon Buns recipes and haven’t come across one I loved until now.

These cinnamon buns come out deliciously sweet and cinnamon-ie. The pastry doesn’t come out too doughy or too bready and is very soft.

Definitely the best Cinnamon Bun recipe I have tried!

IMG_16441

Ingredients:

  • 3/4 cup milk
  • 1/4 cup margarine
  • 2 3/4 cup flour
  • 1 package instant yeast
  • 1/4 cup castor sugar
  • 1/2 teaspoon salt
  • 1/4 cup water
  • 1 egg
  • 1 cup brown sugar
  • 1 tablespoon cinnamon
  • 1/2 cup margarine

Method:

  • Heat the milk in a small saucepan until it bubbles, then remove from heat. Mix in margarine; stir until melted. Let cool until lukewarm.
  • In a large mixing bowl, combine 2 1/4 cup flour, yeast, sugar and salt; mix well. Add water, egg and the milk mixture; beat well. Add the remaining flour, 1/2 cup at a time, stirring well after each addition. When the dough has just pulled together, turn it out onto a lightly floured surface and knead until smooth, about 5 minutes.
  • Cover the dough with a damp cloth and let rest for 10 minutes. Meanwhile, in a small bowl, mix together brown sugar, cinnamon, softened margarine.
  • Roll out dough into a 12×9 inch rectangle. Spread dough with margarine/sugar mixture. Roll up dough and pinch seam to seal. Cut into 12 equal size rolls and place cut side up in 12 lightly greased muffin cups. Cover and let rise until doubled, about 30 minutes. Preheat oven to 375 degrees F (190 degrees C).
  • Before placing in the oven, melt a little more margarine and brush over the cinnamon buns. This will make the dough extra soft and yummy.
  • Bake in the preheated oven for 20 minutes, or until browned. Remove from muffin cups to cool. Serve warm

Let me know if you try these

– Bee

Disney Cakes and Sweets Review | Issue 4

Posted on

I was so excited this morning to go get the next issue of Disney Cakes and Sweets Issue 5 and then I remembered I completely forgot to do my review on Issue 4!

So my apologies that this is late and you probably won’t be able to pick up Issue 4 anymore (unless you get it online) but I wanted to go ahead with the review anyways because I really enjoyed this Issue.

$T2eC16hHJGsFFMmeF(ufBRsbiH,Ynw~~60_35

Issue 4 featured Piglet on the cover, and with the magazine, you were given an adorable 3D Piglet mould.

piglet

It is hard to tell from this picture but this is actually a pretty big mould.

It is about the size of a small child’s head.

The magazine gives a recipe for blancmange which you can make using this mould, and also suggest baking a sponge cake in it.

I didn’t use the Piglet mould yet but it could potentially come in handy for making a small cake in the future.

So the seven character related recipes given in this issue were as follows:

Piglet’s Blancmange and Sponge

So as I mentioned above, you can use the Piglet silicone mould to create either a blancmange (which is basically a creamy fruity jelly) or bake a sponge cake in it.

If you would prefer, you can also make regular jelly in it or even if you made your own homemade ice-cream and let it set in the mould I think could work.

Cruella’s Peppermint Creams

Cruella is the first Disney villain to be featured in this magazine series which I was very excited about. I love Cruella, and also loved her peppermint creams.

So these peppermint creams are basically like eating a minty sugar cube, but they are really good!

The recipe called for a lot of sugar, so I decided to half the recipe and it still made 12 peppermint creams.

I won’t give away the actual recipe because that wouldn’t be fair to those to paid money to buy this magazine, but the ingredients are basically cream, icing sugar, peppermint extract and chocolate. So definitely not a healthy recipe, but it was nice as a little treat. And they didn’t last very long in the house!

One tip I will give you if you are making these is to make them just before going to bed, this way you don’t feel like you have to wait as long for them to set. It says they take about 12 hours to set. And I know that I get very impatient when I have to wait for things to set so I made them at night then the next morning when I woke up they were ready to put the chocolate on and eat.

IMG_1588

Eeyore’s Crunchy Nut Cookies

When I read that this recipe had pecans I knew I had to try them because I freaking love pecan cookies.

Something I found odd with this recipe was that instead of mixing the sugar and butter together with a mixer (like you would in most cookie recipes), the first step was to add the butter in cubes and rub into the flour (which is what you do when making pastry or bread).

So even though this was odd, I went with it and the cookies came out more like mini heavy cakes but it still tasted good so hey can’t complain.

I did however tweak the recipe a little bit. For instance the recipe never says to toast the pecans before adding them to the mixture, but I know from past experience that toasted pecans are WAY nicer in cookies and brownies than raw pecans. So I toasted my pecans in the oven before making these cookies.

Also I added a lot more flour than stated in the recipe because the mixture was far too wet for a cookie dough.

Other than that the cookies were nice – but having said that I think I will stick to my own Pecan Cookie recipe from now on.

IMG_1545

Jungle Book Party Pavlova

Pavlova is basically a meringue with fruit on it so this recipe would be perfect for a party or even a birthday if someone doesn’t like cake.

On this particular pavlova it had fruit like mango, kiwi, pineapple even banana. If I were making it I would probably go with berries but you can pretty much make it to taste.

Thumper’s Cute Carrot Cake

Well you can either look at this as either very sneaky or very clever.

This ‘carrot cake’ is not actually a carrot cake. It is a madeira cake in the shape of a carrot!

Now I can see why they made a madeira instead of a carrot cake, because a carrot cake is so moist that it wouldn’t really hold the shape of a carrot and the whole thing just wouldn’t look as good as it would if you made a madeira. Having said that you can still make an actual carrot cake too.

I didn’t make this cake (but I might do it for a future birthday cake!) but it did have an adorable 3D sugarpaste Thumper on top which is too cute not to show you.

IMG_1589

Mater’s Really Rocky Road

I had a good long laugh at this title – probably longer than I should have, but if you have seen Cars then you will get the joke.

I had never made Rocky Road before but I have made biscuit cake and they are very similar.

This recipe was so simple to make. It would be perfect to make and bring to a friends house, or perfect if you have little kiddies who really want to make something.

Instead of the cherries that were called for in the ingredients, I put in raisins but you can pretty much add in anything you like – raisins, nuts, etc.

I didn’t actually have any of this seeing as there were marshmallows in this and I am a vegetarian, but my brother really seemed to like it which is good because I made it for him specifically.

IMG_1540IMG_1542

Peter Pan’s Treasure Chest: Part 1

This issue gives part 1 (of 2) how to make a treasure chest cake.

I had no reason to make this cake but it would be perfect for a little boys birthday cake or any kind of novelty cake for a specific occasion.


Also included in this issue was a step by step guide on how to model a thumper for the top of the ‘carrot cake’ and six different meringue recipes (I didn’t even know there were six different types of meringue!)

That is it for this weeks Issue (Well I guess it was last weeks, whoops!)

I’ll be back in a few days to review Issue number 5!

– Bee

Ginger Cake Recipe

Posted on

Coming into the autumn/winter season, it’s time for spice cakes so I decided to make a ginger cake even though I have never made one before. This cake was nice, really moist and a lot of cinnamon and ginger spice flavour.

Ginger

Ingredients:

  • 2 cups flour
  • 1 teaspoon baking soda
  • 1/4 teaspoon salt
  • 1 1/2 teaspoon ground cinnamon
  • 1 teaspoon ground ginger
  • 1/8 teaspoon ground cloves
  • 1/2 cup (113g) unsalted butter
  • 1/2 cup light brown sugar
  • 2 large eggs
  • Zest of 1 lemon
  • 1/2 cup molasses
  • 1 cup milk


Method:

  •  Using an electric mixer, combine butter and sugar until light and fluffy.
  • Add eggs.
  • Add lemon zest and molasses.
  • Add dry ingredients and milk, alternating as you go, and ending with the dry ingredients.
  • Pour batter into prepared baking tin (I used a loaf tin) and bake in a preheated oven @180 degrees C (350 F) for 40-45 minutes.

This is a very easy mixture to put together and the end result comes out really nice.

– Bee

Disney Cakes and Sweets Review | Issue 2 & 3

I was so busy last week that I have had to combine Issue 2 and 3 in the same post, I do apologise!

photob

Let’s start with Issue 2 (The Winnie The Pooh cover)

The utensils given with this issue were two Winnie The Pooh moulds.

Untitled

In the magazine it shows how you can use these moulds to make a cute Winnie the Pooh cake.

photog

I however did not have any need to make this cake but I did use these moulds this week. I had a few cupcakes to make for a little girls second birthday who, luckily for me, really likes Winnie The Pooh.

Instead of using the moulds as suggested in the magazine, I took a different approach.

In one batch I simply melted milk chocolate and made the characters this way. But for the cupcake toppers I used coloured candy melts that you can buy from a cake supply shop. I used yellow for Winnie, Pink for Piglet, Orange for Tigger, and for Eeyore, I used the pink and added some blue to get that indigo colour eeyore has which worked perfectly. Unfortunately I was in such a hurry with the cupcakes I forgot to take a picture of them but here is what the chocolate moulds looked like.

photo


Also in this issue there was a recipe for fudge, and seeing as both my brother and father like fudge, I thought I would give it a go. I followed the recipe exactly but the fudge never set, which is quite annoying but it worked fine as a fudge ice-cream sauce. Still though, fudge is supposed to be fudge so I’m not sure if there is a problem with the recipe, or one of the ingredients I used, who knows.

On to Issue 3 which gifts were as follows: Minnie Mouse Cookie Cutter, Modelling Tool, and 10 Disney Characters to stick into your Castle Cake (Part 3 of 3 was in this issue)

photod

Now I never made any cookies with my new cookie cutter, but it is actually the exact same cookie recipe as in Issue 1 which I was a little annoyed at because it’s only issue 3. It’s a bit early to start repeating recipes (not that they should be repeating recipes at all!) But oh well. Overall I was still pleased with this issue.

The only thing I had time to make though was Piglet’s Snuffle Truffles, and boy was I glad I did. This is a delicious recipe and makes really nice truffles which are great for treats for yourself and family, but would also make great little presents for your friends etc.

photofphotoe

To the left is the recipe from the magazine and to the right is the truffles I made. And let me tell you they went down a treat! I don’t think they lasted more than a few hours! But they are very rich and filling.


Again both magazines had extras in the back. In Issue 2 it gave 6 different pastry recipes which will come in very handy, and in Issue 3 they gave 6 different icing recipes, again very handy.

The magazine has now gone up to €5.99 and will stay at this price for the duration of the subscription. I know this may seem steep to some of you, but honestly it is well worth it. It would cost that much to buy the giant Minnie Mouse cookie cutter, or Winnie the Pooh moulds alone, and each recipe gives 7 different Disney related recipes, as well as tips on how to decorate cakes, and as I said various standard recipes (like pastry or icing).

3 Issues in and I am still a very happy camper.

Sorry I didn’t get chance to try out too many of the recipes, but hopefully after next week I’ll have a bit more time.

Hope you have enjoyed, and get busy baking!

– Bee

My Great British Bake Off | Episode 6 Sweet Dough

This week on The Great British Bake Off was sweet dough week.

Contestants had to carry out these three challenges;

  • Signature Dish: Contestants had to bake a signature sweet dough tea loaf.
  • Technical Challenge: in which contestants had to recreate one of Paul Hollywood’s recipes. This time his Apricot Couronne.
  • Showstopper Challenge: in which contestants had to make two different sweet dough buns.

Unfortunately I was pressed for time this week (which is also why my Disney cakes review isn’t up yet sorry!) so I only got to make one item and that was a tea loaf.

Since this was part of the ‘signature dish’, I thought I would go with an Irish signature dish, one that I had never made before and that is…Bairín Breac!

bb3

Bairín Breac (which is the Irish for Barmbrack) is the centre of Irish Halloween tradition. The Halloween Brack traditionally contained various objects baked into the bread and was used as a sort of fortune-telling game. In the barnbrack were: a pea, a stick, a piece of cloth, a small coin (originally a silver sixpence) and a ring. Each item, when received in the slice, was supposed to carry a meaning to the person concerned: the pea, the person would not marry that year; the stick, would have an unhappy marriage or continually be in disputes; the cloth or rag, would have bad luck or be poor; the coin, would enjoy good fortune or be rich; and the ring, would be wed within the year. Nowadays if you buy a breac in the shop, it will generally only contain a ring, but it is still exciting to see who will get it!

I really love breac, and seeing as it’s coming up to Halloween I thought it would be the perfect time to try out this recipe, and it just happened to coincide with My Great British Bake Off! And let me tell you, I was not disappointed with the results! Oh and the best part is there is no fat in it, so it is a healthy loaf too!

Ingredients:

  • 375 g (13oz) packet of mixed dried fruit
  • 50 ml (2fl oz) whiskey
  • 250 ml (9fl oz) cold tea
  • butter, for greasing
  • 2 tsp baking powder
  • 225 g (8oz) plain flour
  • 125 g (4½oz) soft light brown sugar
  • 1/2 tsp mixed spice
  • 1 large egg
  • a ring, to place inside (optional)

Method:

  • Place the mixed dried fruit in a bowl and pour over the whiskey and cold tea. Allow to soak up the liquid overnight.
  • Preheat the oven to 170°C (325°F/Gas 3). Grease and line a 900g (2lb) loaf tin.
  • Combine the flour, baking powder, sugar and mixed spice in a mixing bowl. Make a well and break in the egg, then use a wooden spoon to mix it with the dry ingredients. Add a little bit of the liquid from the mixed fruit and mix it through. You may not need all the liquid, though you are looking for a wet dough.
  • Stir in the mixed fruit until everything is thoroughly combined. Add the ring and stir through. Spoon the wet dough into the lined loaf tin, place on the middle shelf in the oven and bake for 1 hour.
  • Remove from the oven and allow to cool slightly before removing from the loaf tin and placing on wire rack. Cover in cling film and foil and allow to sit for 1–2 days before cutting into it. Serve in slices, spread with a little butter and accompanied by a good cuppa!

bb1 bb2

So, there was just enough whisky left in the bottle to cover about half this recipe, so I just made up for it in tea (which worked perfectly by the way, if you want to leave out the whisky altogether you can, just add 50ml more of tea!).

I have you the original recipe I followed, even though I made a few modifications to it as follows;

Instead of using mixed fruit, I used just raisins and sultanas because no-one in my family likes mixed peel which is often found in bairín breac. Also, I put in 12oz (even though the recipe calls for 13oz, but 12 was still far too much for my liking. Next time I make it (and there will be a next time) I am going to use just 10oz of raisins/sultanas).

Also the recipe says add a little bit of the liquid from the mixed fruit, however my raisins soaked up most of the tea so I added all of the liquid, then needed to add more water because it wasn’t the right consistency. This is just something to keep in mind if you are making this recipe.

Also, the last step in this recipe says to leave for 1-2 days before cutting into it?! I maybe waited 1-2 hours! I was at my granny’s house, so my sister took this out of the oven for me, and I got home about 2/3 hours later and cut into it straight away! (It was delicious!) I think the reason they say to leave it is so it can become firm and dry out a little bit. But mine was nice, not too moist and I loved it so really waiting is optional as far as I see it!

Hope you have enjoyed, and please let me know if you try this traditional Irish recipe (especially if you are not Irish) I would love to know what you think of it!)

– Bee

Banoffee Cupcakes Recipe

Here’s the thing, I love banoffee (like banoffee flavoured anything) but I don’t like bananas. I love artificial banana flavour, but i do not like banana’s…the human brain is a strange and complicated thing.

So I came across a Banoffee Cupcake recipe and I thought I would share.

photog

Ingredients:

  • 2 very ripe bananas
  • 125g self raising flour
  • 100g unsalted butter
  • 100g caster sugar
  • 2 eggs
  • 1tsp baking powder
  • 12 teaspoons caramel

Frosting

  • 100g Caramel
  • 300g icing sugar
  • 85g unsalted butter

Method:

  • Preheat the oven to 180°C (160°C for fan ovens), Gas Mark 4.  Place cupcake cases into the tin.
  • Mash the bananas in a dish and set aside.  In a separate large bowl add the flour, buttery spread, caster sugar eggs and baking powder and beat until light and creamy (use an electric hand mixer if you have one).  Fold in the mashed bananas.
  • Spoon half the mixture into the cake cases, add a spoonful of caramel into each and top with the remaining cake mix. Bake for about 20 minutes or until springy to the touch. Remove and cool.
  • Beat 100g caramel with the buttery spread and icing sugar to form a thick icing.  Spoon into a piping bag with a fluted nozzle and pipe onto the cakes.  Beat a few tablespoons of the caramel until smooth and drizzle over the icing.  Top with a banana slice and chocolate dusting if you like!


The cupcake itself it pretty much banana bread, and even though there are two bananas in it, the banana isn’t too overwhelming.

It makes a really nice cupcake and tastes good too 🙂

– Bee

My Great British Bake Off | Episode 5 Biscuits

This week was biscuit week on The Great British Bake Off, and it has suddenly dawned on me that I managed not to make a biscuit at all…but more on that in a minute.

So for this weeks challenge contestants had to do three challenges;

  • Signature Bake: Contestants had to bake a traybake such as brownies, rocky road etc (basically anything traditionally baked in a tray and it could be biscuit or cake based)
  • Technical Challenge: In which contestants had to recreate Mary Berry’s Tuille recipe
  • Showstopper Challenge: In which contestants had to bake and build a biscuit tower.

Unfortunately this week I was a bit pressed for time, so the only challenge I was able to do was traybake.

But I still set myself a challenge and baked a recipe I had never tried before and that was Cheesecake Brownies.

Cheesecake Brownie 2

Ingredients:

Brownie  Layer:

1/2 cup (113 grams)  unsalted butter cut into pieces

4 ounces (115 grams) unsweetened  chocolate, coarsely chopped

1 1/4 cups (250 grams) granulated white  sugar

1 teaspoon pure vanilla  extract

2 large eggs

1/2 cup (65 grams) all purpose  flour

1/4 teaspoon salt

Cream Cheese Layer:

8 ounces (227 grams) full fat cream  cheese, at room temperature

1/3 cup (65 grams) granulated white  sugar

1/2 teaspoon pure vanilla  extract

1 large egg

Method:

Preheat oven to 160 degrees C

In a  heatproof  bowl, placed over a saucepan of simmering water, melt the butter and chocolate.  Remove from heat and stir or whisk in the sugar and vanilla extract. Add the  eggs, one at a time, beating well after each addition. Stir in the flour and  salt and stir vigorously until the batter is smooth and glossy  (about one  minute). Remove 1/2 cup (120 ml) of the brownie batter and set it aside. Spread  the remainder of the brownie batter evenly onto the bottom of the prepared pan. 

Then, in the bowl of your food processor (or with a hand mixer), process the cream cheese just  until smooth. Add the sugar, vanilla, and egg and process just until creamy and  smooth (do not over process). Spread the cream cheese filling evenly over the  brownie layer. Spoon 16 small dollops (4 rows with 4 dollops of brownie batter  in each row) of the reserved brownie batter evenly on top of the cream cheese  filling. Run a knife or wooden skewer back and forth through the two batters  until you have a marble effect.

Bake in the preheated oven for about 30 minutes or until the brownies are set and the cream  cheese is just beginning to brown. (A toothpick inserted into the brownie comes  out with just a few moist crumbs.) Remove from oven and place on a wire rack to  cool completely. Then cover and refrigerate the brownies until they are firm  enough to cut into squares (several hours or even overnight). Once chilled,  remove the brownies from the pan by lifting with the ends of the foil and  transfer to a cutting board. With a sharp knife, cut into 16 squares. It is a  good idea to have a damp cloth nearby to wipe your knife between cuts. These  brownies can be stored in the refrigerator for several days. Serve cold or at  room temperature.

[This recipe was found on joyofbaking.com]

Overall, I’m pleased with how the recipe came out. Pieces of the brownies were missing before I even got chance to take a picture so that tells you something!

Here’s what it looks like in the inside…

Cheesecake Brownie 1

So unfortunately I was upstairs while this was baking and I didn’t hear the oven bell go off so it was slightly overbaked, but not inedible (in fact no-one even noticed it was overbaked, huzzah!)

So that is it for this week, sorry it’s not overly exciting.

Next week I believe is sweet dough so….that should be interesting!

– Bee

Disney Cakes and Sweets Review| Issue 1

I have been baking for quite a few years now, and I have been a disney fan for all my 21 years of exsistance, so you can only imagine my uncontrollable excitement when I learned of this magazine!

For those of you who don’t know, a new weekly magazine has been published entitled Disney Cakes and Sweets which gives various recipes and tips for baking in relation to different disney characters. The first issue was released on the 5th of September as far as I know as is still available in your local newsagents (providing you live in Ireland/UK that it).

So if you live outside of Ireland/UK and are dying to see more of the magazine, I hope this blog post will help somewhat. Also if you are contemplating buying the magazine but are unsure, hopefully this review will help.

So the first issue will be available for 2 weeks. I imagine this is so to give people plenty of time to get it. Otherwise, it is a weekly magazine, with the next issue available this thursay, the 19th.

So without further ado, let’s get to the review.

First thing’s first, here is what the magazine looks like.
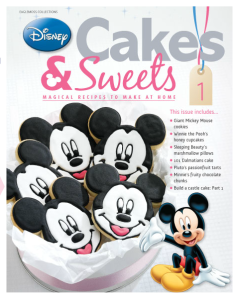
1

If you are looking for it in a shop though, this is what the packaging looks like…
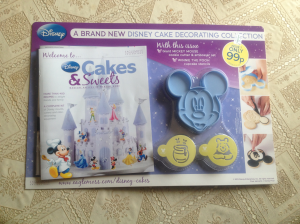
oiuh

My first reaction to the magazine was that I was plesantly surprised my how many recipes were given. From the advertisement on tv, I was expecting maybe 3-4 recipes in each magazine, but in reality, the first issue gave a surprising 7 recipes (as well as giving 4 basic cake recipes at the end of the magazine!)

So what are these 7 recipes?

  • Giant Mickey Mouse Cookies
  • Winnie the Pooh’s Honey Cupcakes
  • Sleeping Beauty’s Marshmallow Pillows
  • Patch’s Dalmatian Paw Print Cake
  • Bullseye’s Best Ever Brownies
  • Minnie’s Fruity Chocolate Chunks
  • Castle Cake

The magazine itself is very well laid, with very clear instructions on how to creat these cakes and sweets. I feel a lot of people may think it is orientated toward children but this is not the case. I would say it is more for adults, however there are boxes on different pages of the magazine which suggest which parts your children can help you make so they can definitely get involved.

Personally, I am 21 years old with no kids, but I still find it a great magazine, whether you are making a cake for a child’s birthday or just making treats for yourself.

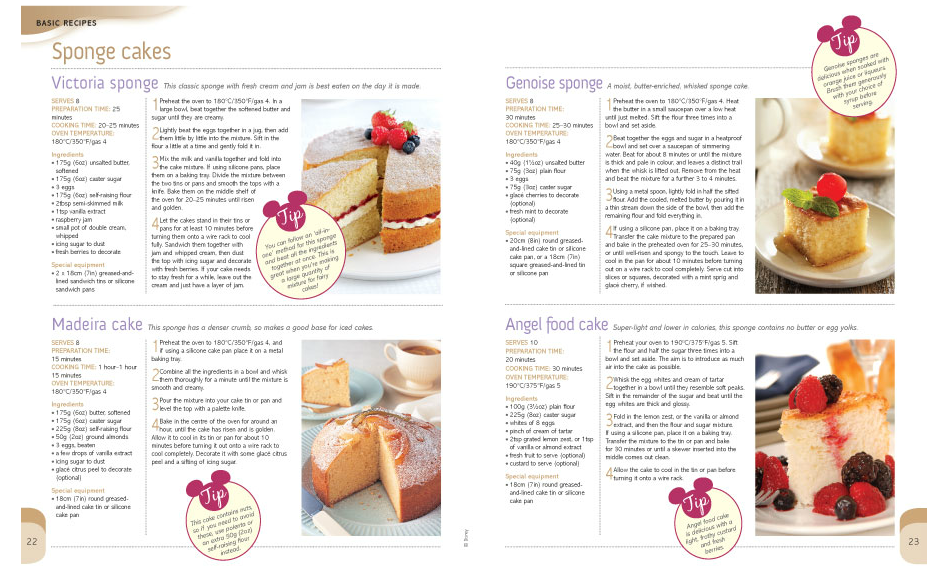
One aspect of this magazine I really liked was at the back it gave four standard cake recipes which I found very helpful.

recipes

And it also gave the different units of measurement which is fanatsic because depending where you get your recipes from, they can sometimes have different methods of measuring ingredients and you can easily get confused, especially if you are a beginner in baking.

Of course this review wouldn’t be a review if I did not try out some of the recipes.

I was most interested in trying out the recipes that needed the ‘free gifts’ you get with the magazine.

In this issue, the magazine came with a giant Mickey Mouse cookie cutter, and two Winnie the Pooh stencils.

Mickey Mouse Cookies

I followed the cookie recipe given in this magazine and made some Mickey Mouse Cookies.

One thing I learned from using it is not to press to hard on the embossing part of the cutter. This just cuts the dough and makes the cookie difficult to move and it falls apart easily. You just have to play around with it until you find a techique that works for you.

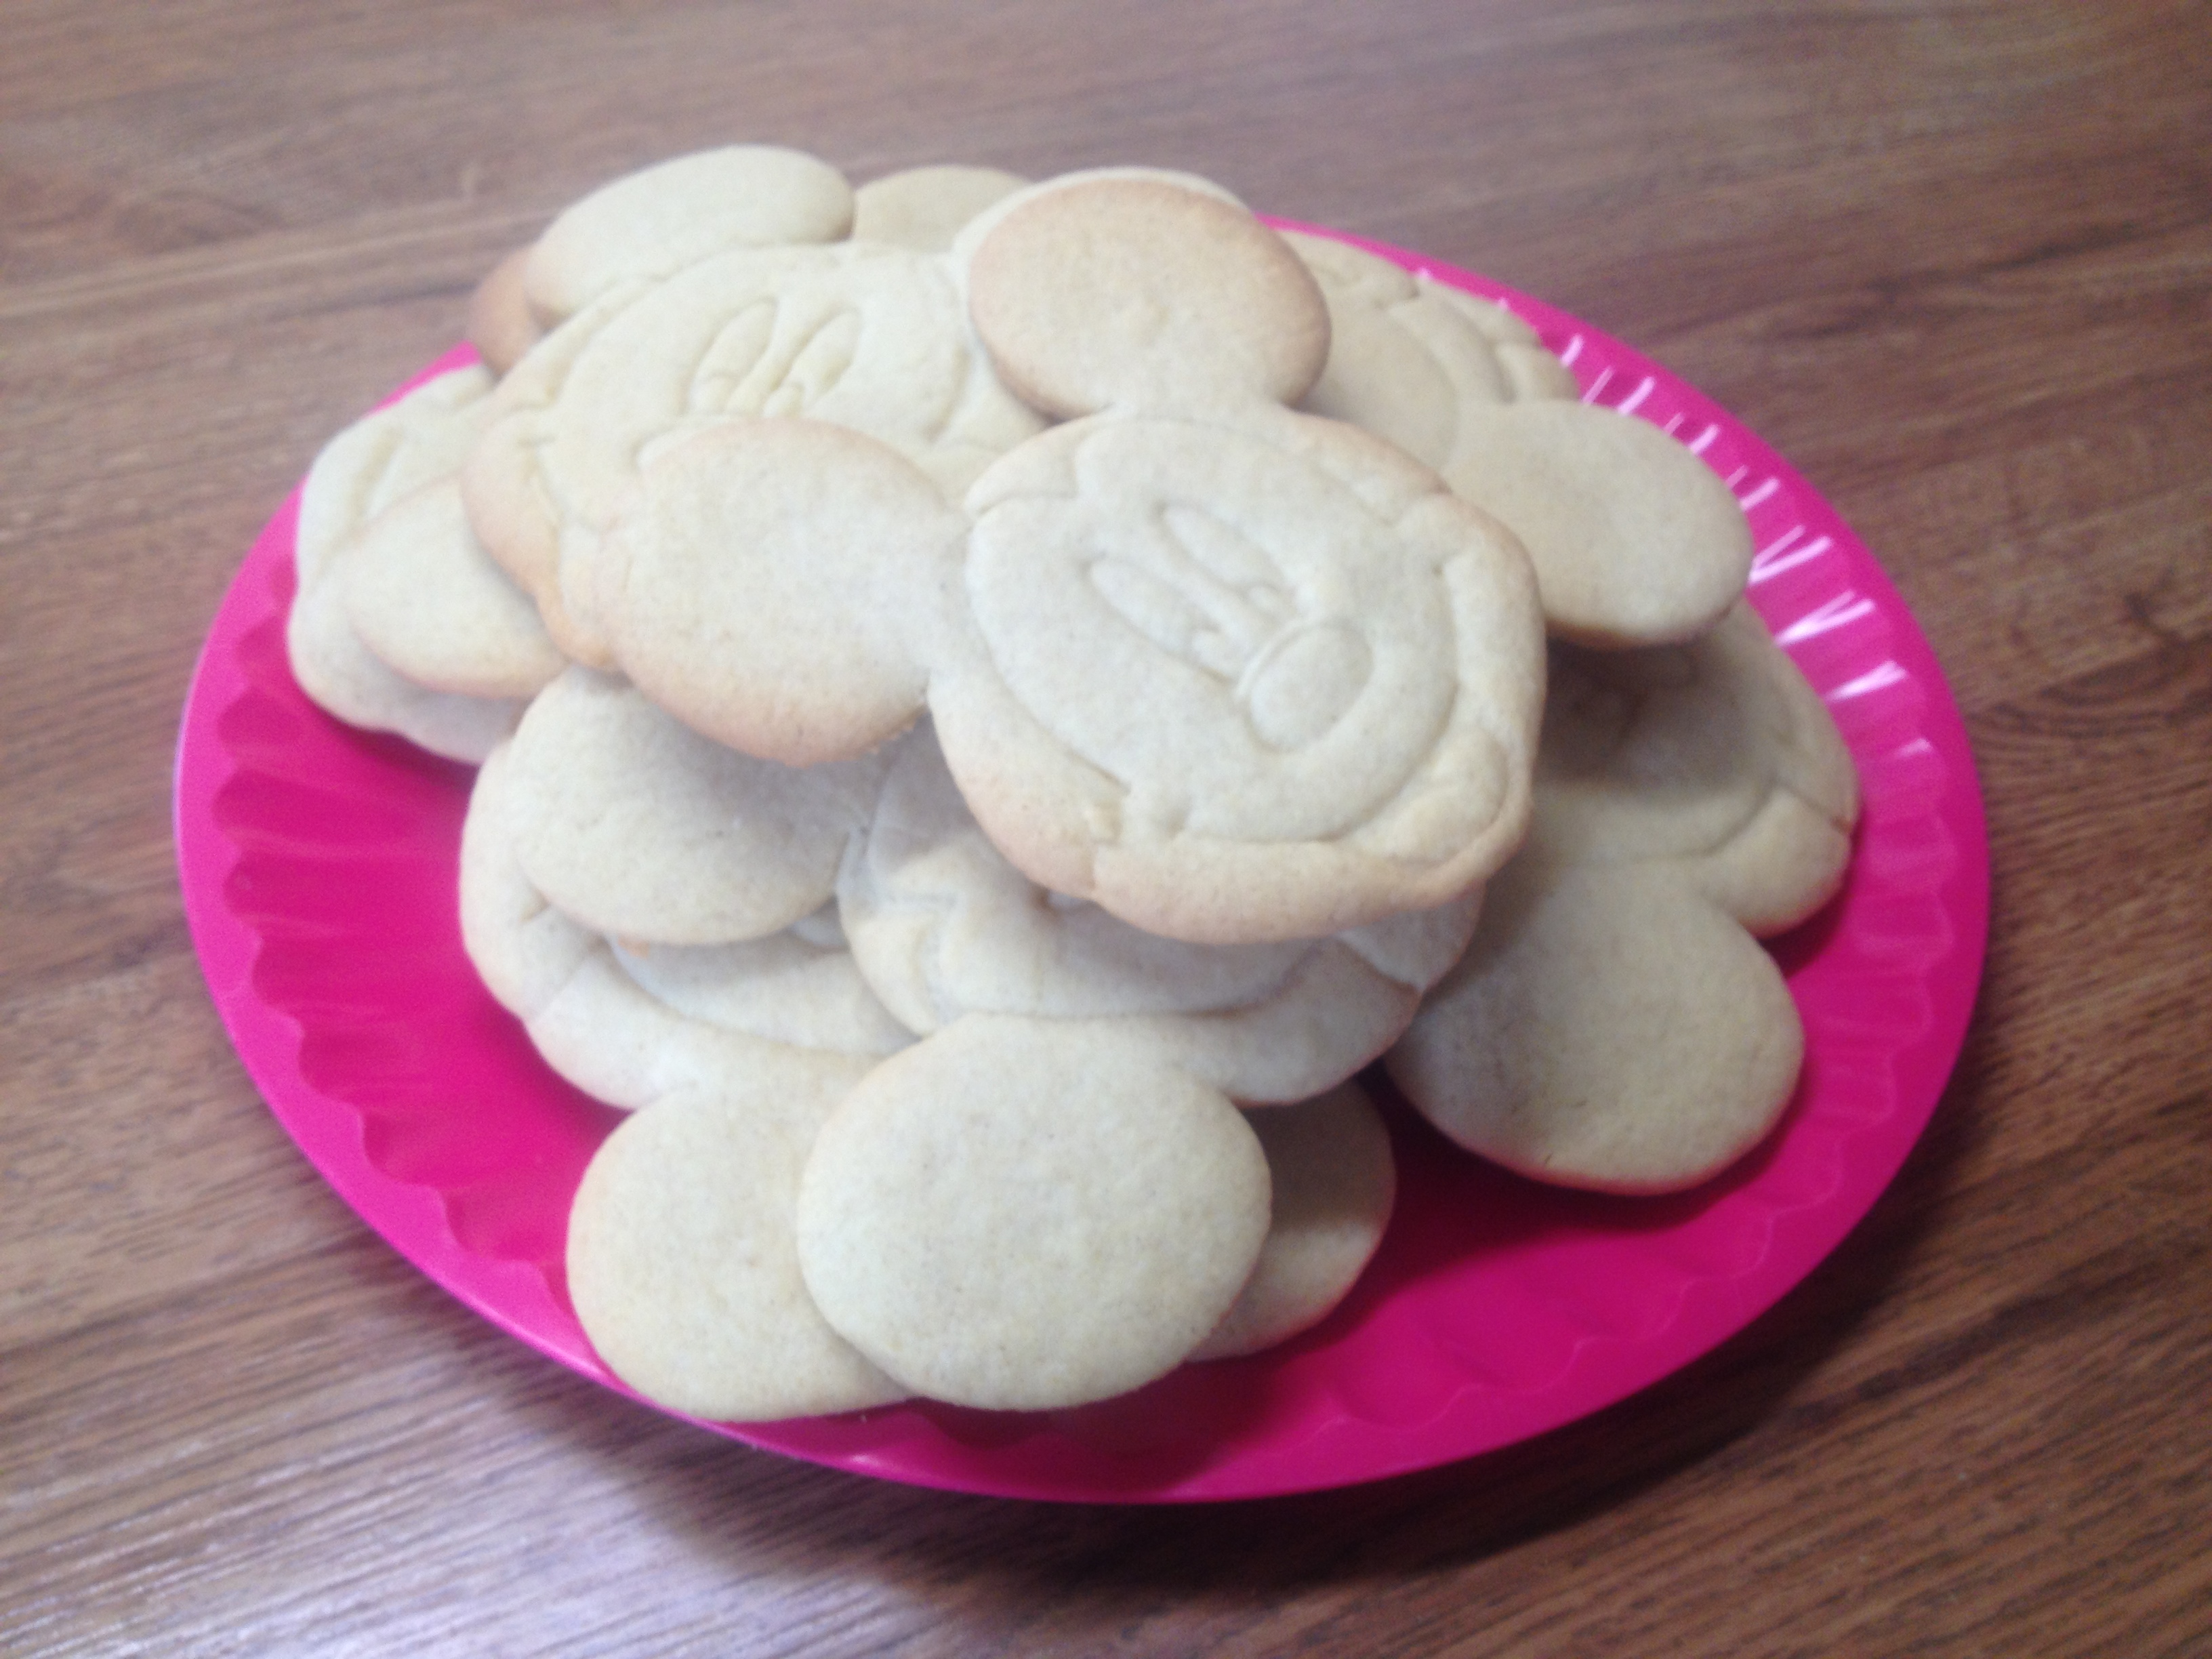
Here is what the cookies looked like.

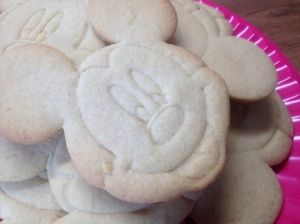
IMG_1360IMG_1362

They held their shape well which I am quite pleased with, but like all cookies they do expand a little bit.

Left plain as they are, I found them a bit dry. I would recommend melting some chocolate and covering them or something similar.

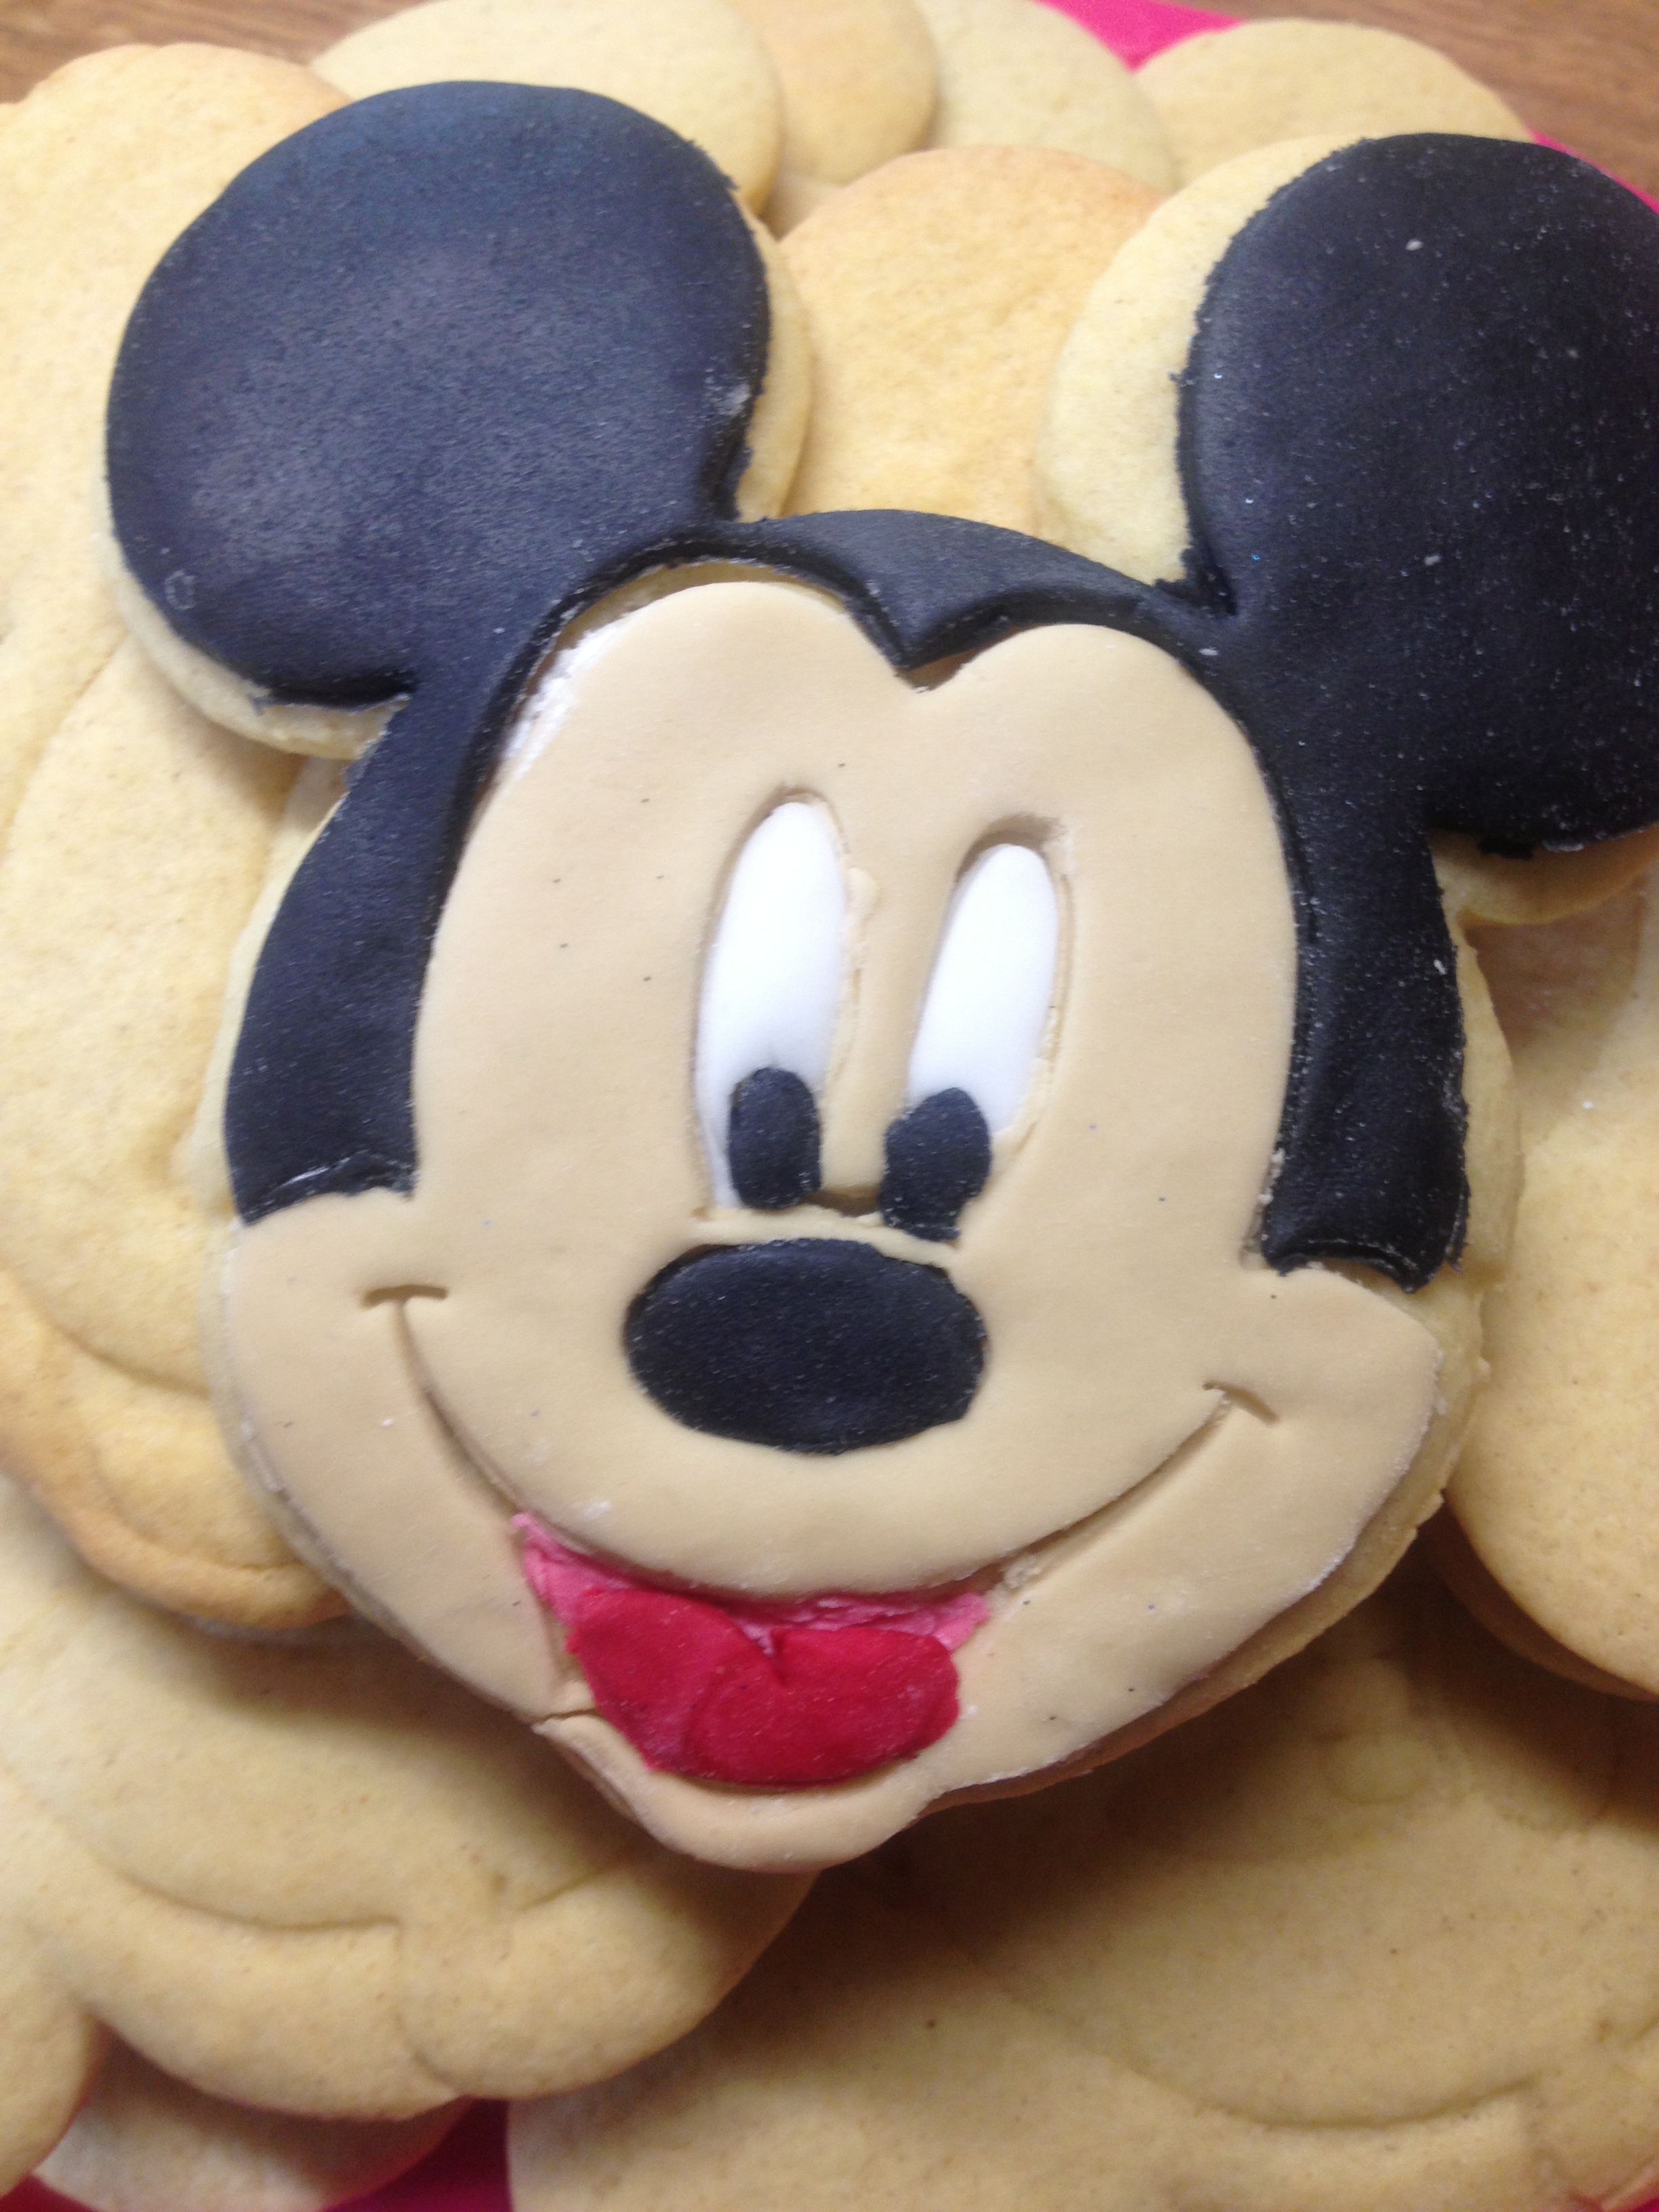
I also covered one with some coloured roll out fondant which was quite fun but very time consuming (which is why I only did one). But this would be very cute for a little boys birthday party (and for a girl you could make some Minnie Mouse ones, a cutter of Minnie Mouse will be coming with Issue 3 I believe!).

IMG_1363IMG_1364

Winnie the Pooh Honey Buns

I was very intruiged when I read the ingredients for this recipe because I noticed there was no sugar! Also it is made using whole wheat flour, so in actual fact these buns are reasonably healthy.

Honey is used as a substitute for sugar and surprisingly, despite the fact this recipe calls for 7oz of honey, the taste of honey from the bun is not too strong.

When I was a kid, I loved Winnie the Pooh so much that I use to force myself to eat honey, despite the fact that I hated it! So naturally I was unsure as to whether or not I would actually like these buns considering there was a lot of honey involved. But they actually turned out okay.

I can see why the magazine suggests covering them with fondant though because it does need that extra bit of sweetness, but if you do not have a sweet tooth then perhaps this recipe is perfect for you!
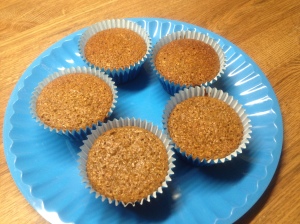
IMG_1365IMG_1366

The stencils that came with the magazine were designed for this recipe so naturally I had to give it a go.

I rolled out the fondant and tried several different methods of using the stencil.

First I mixed yellow food colour powder (yellow) with vodka. I know what you are thinking vodka on a cake? But what happens is the vodka mixes with the powder creating a sort of food paint. Then as the ‘paint’ dries, the vodka evaporates and I promise you, you can not taste the vodka!

I tried this method but the ‘paint’ was too runny for the stencil, which resulted in a smudged mess as you can see below

img_13692

I also tried using edible glue and edible glitter. This method actually worked surprisingly well, despite the fact I forgot to cover Winnie’s eyebrows – whoops!

IMG_1367

Finally I accidentally discovered my next method. I pushed down too hard on the stencil against the fondant and it came out as a reverse embossed effect and it worked so that is an alternative method you could use.

img_13683

Another great thing about the magazine is it actually gives you instructions as to how to use the stencils, which is great for beginners.

It also gives more hints and tips, like how to cover a cake with roll-out icing (or fondant)

So, since this was the first issue, it only cost €1.99 (£0.99), and I believe the next issue will cost €3.99 (£2.50) but then from Issue 3 onwards it will cost the regular price of €5.99 (£3.99).

I honestly think you get your moneys worth. The way I always look at it is, if you were to go on a night out in Ireland, one drink would cost you roughly €5, which is gone in minutes, whereas this magazine will only cost €6 and you get to keep it for life, not to mention the gifts that come with it each week. So am I happy I purchased it? Absolutely!

Now if you are wanting to go that extra step, you can always subscribe to this magazine by going to http://www.eaglemoss.com/disney-cakes

This will cost the exact same as shipping is free, plus you get 5 free gifts worth up to £80!

I was going to subscribe, but the thing that put me off is you get one delivery of 4 magazines per month, whereas I could just go down to the shop weekly to purchase the magazine. I am very impatient so I don’t think I could wait once a month knowing other people already have their copies.

One reason I was tempted to subscribing was the binders you get to hold all your magazines. BUT alas, I read that once their online shop is set up (which they said could be a while) you can buy the binders from here, so I think that is what I will do.

So I think that pretty much covers everything, but if you have any questions about the magazine, please feel free to ask me. If anyone is interested I would definitely be willing to do these posts every week when the magazine comes out trying out the recipes etc.

– Bee

My Great British Bake Off | Episode 4 Pies and Tarts

Episode 4 of The Great British Bake Off showed contestants having to tackle pies and tarts, something I was looking forward to because for once I had actually attempted this before.

So here are the challenges the contestants faced:

  • Signature Bake: Contestants had to make a pie, filling of their choice. Sounds simple right? But surprisingly some contestants found this a difficulty challenge.
  • Technical Challenge: For this contestants were told they would have to bake Paul Hollywood’s Egg Custard Tarts. They were given very basic instructions aimed to test their baking ability.
  • Showstopper: For this challenge contestants had to make a pie using filo pastry (notoriously difficult to make) and again using the filling/flavouring of their choice.

So for my challenge this week, I was going to make an apple pie, but this wasn’t much of a challenge seeing as I have done it before and it came out pretty nice.

So for my challenge this week I decided to attempt Paul Hollywood’s Egg Custard Tarts.


Ingredients:

For the sweet pastry

  • 165g/5¾oz plain flour, plus extra for dusting
  • 25g/1oz ground almonds
  • 120g/4¼oz chilled unsalted butter, cubed
  • 55g/2oz caster sugar
  • 1 free-range egg

For the custard filling

  • 700ml/1¼ pint full-fat milk
  • 7 free-range egg yolks
  • 90g/3¼oz caster sugar
  • freshly ground nutmeg


Method:

  • To make the pastry, stir the flour and ground almonds together in a large bowl, then add the butter and rub in with your fingertips until the mixture resembles breadcrumbs. Stir in the sugar.
  • Break in the egg and work it into the mixture with your fingers, bringing it together to form a soft dough.
  • Tip the dough onto a lightly floured work surface and shape it into a ball. Flatten with your fingers to a disc and wrap in cling film. Leave to chill in the fridge for 30 minutes.
  • Preheat the oven to 200C/400F/Gas 6.
  • Roll out the sweet pastry on a lightly floured work surface.
  • Using an 11cm/4½in fluted cutter, cut out twelve discs and line the muffin tray moulds with the pastry circle. The pastry should overlap the top of the moulds by a few millimetres, so that you can crimp the edges if you wish.
  • For the custard filling, warm the milk in a saucepan, and beat the egg yolks and sugar together in a separate bowl until pale and creamy.
  • Pour the milk onto the egg yolk mixture and stir well, creating little bubbles.
  • Transfer the custard mixture into a pouring jug with a lip, then fill each of the tart cases.
  • Sprinkle a small pinch of ground nutmeg into the middle of each tart.
  • Bake the tarts in the oven for about 10-15 minutes, then turn the temperature down to 180C/350F/Gas 4 and bake for another 10 minutes. You are looking for a very slight dome on the custard, indicating that it is baked. If the custard domes too much this indicates that you have over-cooked the custard, it will have boiled, and will sink back down leaving a big dip. If this does happen you can help rescue it by removing the tarts from the oven immediately and placing the tin in cold water on a cold surface.
  • Cool in the tin for 30 minutes and then carefully remove from the moulds. The base of the tarts should be perfectly baked through, without having over-cooked the custard filling.


So here are my results…

photo2

So they didn’t come out as neat looking as some of the contestants but they still tasted fine.

I was really pleasantly surprised by how well the pastry turned out. It is quite hard to make a decent pastry but if you want to attempt it, I recommend trying this recipe. One thing I will say though is I followed the recipe precisely and the dough came out far too wet and sticky. I had to use a lot of flour to get it to a state where I could actually roll it out, so I don’t know whether this was a mistake in the recipe or what but I definitely recommend adding more flour to your dough.

photo1

This recipe also called for home-made custard which I had never attempted before, and to be honest I don’t know whether I will make it again. I hate to say it but store-bought custard tastes way nicer! I think that is why I didn’t really enjoy these all that much, but my sister really enjoyed them so hey they couldn’t be that bad!

A little tip I picked up from watching the show is one of the contestants, Ruby, cut out strips of baking paper and made a cross then place the cut out pastry on top, this way you have a tab to pull so you can easily get them out of the tray once baked. In the episode, Ruby was seemingly the only contestant who didn’t have any problems getting her tarts out of the muffin tray, whereas everyone else seemed to struggle. This is a very handy tip which I used when baking.


If you have made these before or try out this recipe please let me know what you think.

I will be back on Wednesday (back to schedule) with my next Great British Bake Off post about biscuits, yay!


– Bee

My Great British Bake Off | Episode 3 Desserts

[Sorry this will be my last post of the day, I’m just trying to get caught up before my next Great British baking post. This post was actually written a week ago and posted on my other blog but I wanted to post it here too in case anyone was interested. I will be posting My Great British Bake Off blogs every Wednesday.]

My oh my, let me start off my saying this week was an absolute failure!!!

Last night’s episode of The Great British Bake Off shows the contestants challenged with various desserts.

Here are the three tasks they had to perform;

  • First up was the contestants ‘signature bake’ which was a trifle (flavour, ingredients etc of their choice)
  • For the ‘technical challenge’ contestants had to recreate Mary Berry’s Floating Islands (to put it simply poached meringue in custard)
  • Then for the show stopper, they had to bake 24 petit fours; 12 biscuit based, 12 cake based.

So knowing I was challenging myself to recreate one of these dishes, I wasn’t all that pleased with what they made in the show. Trifle was knocked out as a contender immediately seeing as I don’t like trifle and not many people in the house would eat it (there was no point baking something that would go to waste!). Next was Mary Berry’s Floating Island, and if you watched the show you will have seen how difficult these are to make, and quite frankly they were a very posh dessert. Now I was actually going to attempt to make these but there was no cream in the house and I didn’t want to run down to the shop to get any, so that was out. So I was left with the petit fours. But then I thought it was a little silly spending so much time trying to get the desserts so small so I noticed a lot of the contestants made macaroons for their petit fours, and I have never tried making these before (I actually had never even seen/tried one before) so I thought, this would be my challenge.

I found this recipe on howtocookthat.net!

Macaroons Recipe

Ingredients

  • 4 large egg whites
  • 1/3 cup or 70g caster sugar
  • 1 1/2 cups or 230g pure icing sugar
  • 1 cup or 120g almond meal
  • 2g salt (tiny pinch)
  • gel food colouring (optional)

Method

Preheat the oven to 150 degrees C
Place egg whites and cater sugar in a bowl and mix with electric mixer until stiff enough to turn the bowl upside down without it falling out, continue to whip for 1-2 more minutes.  How long this takes will depend on you mixer.  Add gel or powdered food colouring and continue to mix for a further 20seconds.

Sift the almond meal and icing sugar and salt twice, discarding any almond lumps that are too big to pass through the sieve. Fold into the egg white mixture. It should take roughly 30-50 folds using a rubber spatula.  The mixture should be smooth and a very vicious, not runny.

Pipe onto trays lined with baking paper, rap trays on the bench firmly (this prevents cracking) and then bake in the oven for 20 minutes. Check if one comes off the tray fairly cleanly, if not bake for a little longer (make sure you are using NON-stick baking paper or they will stick).

Once your macaroons are cooked, pipe buttercream into the centre (or you can use ganache etc)

So I made two different flavour macaroons, and here is what they turned out like

Macaroons

So as you can see there is some pink and some green macaroons.

The pink ones are bubblegum flavour. Just after whipping the egg whites and sugar I mixed in some red food colour powder. I want to emphasis the importance of using powder here. If you use liquid food colour the mixture would be too runny. I found my mixture was runny enough and I used food colour powder so that’s just my recommendation.

The bubblegum flavour is actually in the buttercream in the middle. I just added some bubblegum flavouring to it (and it does taste just like bubblegum!)

The green macaroons are peppermint. Again, I added green food colour powder to the egg white mixture, and the peppermint flavour is in the buttercream.

Now, I have never had macaroons before, nor have I even seen them before so I’m not entirely sure what they are supposed to taste like but I know what I made isn’t right.

To me they just taste like cubes of sugar, which I don’t like, which is why I said they were a complete failure, but if you have a real sweet tooth and enjoy eating sugar, maybe you will like this recipe, who knows, but I for one did not and I can safely say I will not be making these again.

So desserts week was a bit of a failure, but next week is Pies and Tarts week so I’m quite looking forward to that.

– Bee

Design a site like this with WordPress.com
Get started